
Documentation
Leads
Track potential jobs from first contact through to a scheduled appointment.
See the feature overviewWhat it is
A lead is a potential job before it becomes an estimate. Leads come in from the public request form, phone calls (auto-created from calls longer than 10 seconds), manual entry, or messages.
Lead workflow
New → Contacted → Quoted → Scheduled → In Progress → Completed → Invoiced → Paid, with side branches for No Response, Not Interested, and Couldn't Repair. The system advances stages automatically when you take the matching action (for example, sending an estimate moves a lead to Quoted).
How to use it
- Go to Leads.
- Tap + New Lead or open an existing lead from the list.
- Fill in customer + vehicle + damage details. Add photos if you have them.
- From a lead you can: Send Message, Create Estimate, Schedule Appointment, or Mark Not Interested / Couldn't Repair.
- Creating an estimate from a lead auto-fills the customer, vehicle, and notes.
Accepting a lead
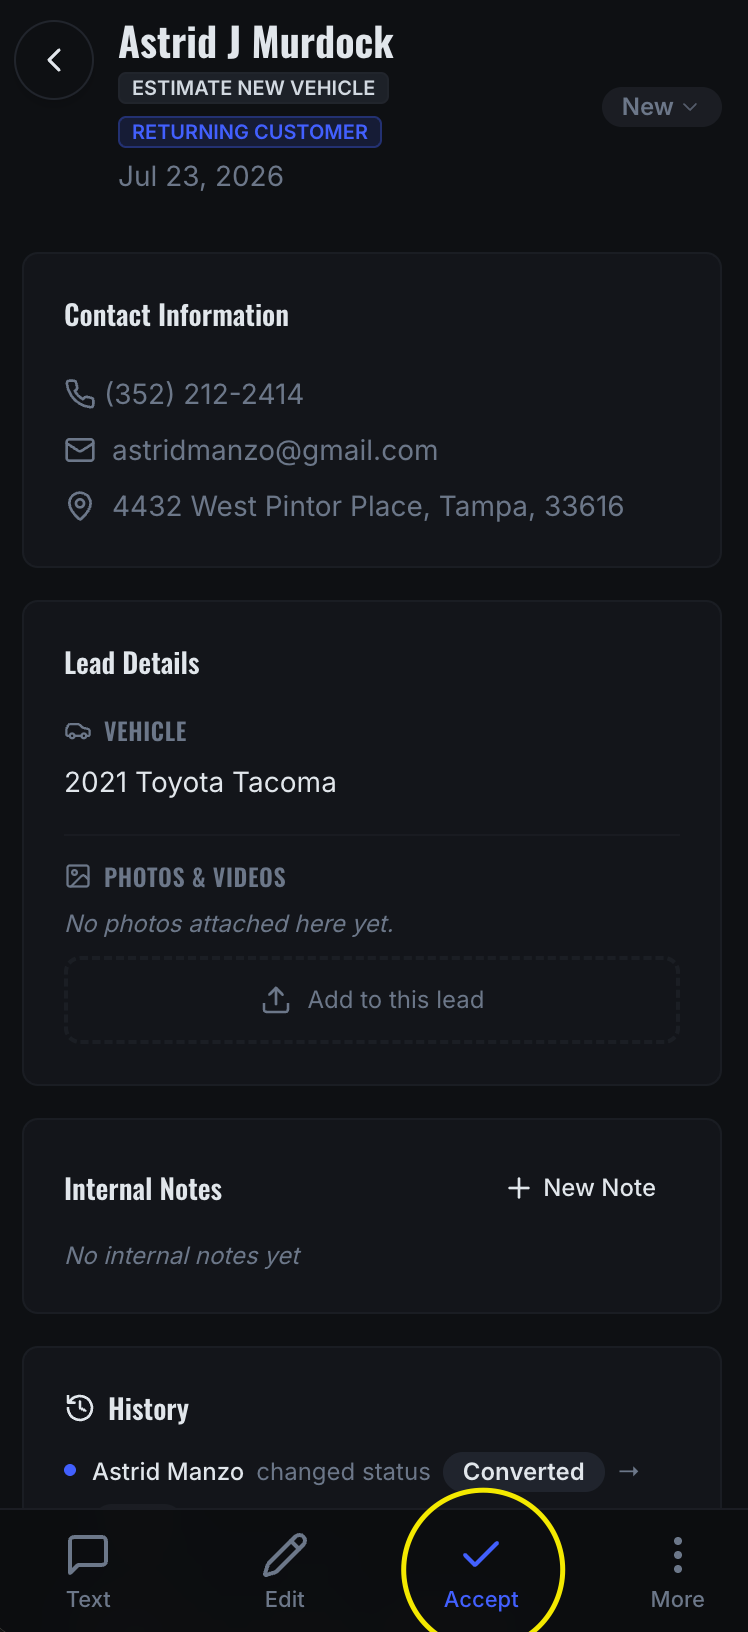
When a new lead comes in, you can accept it and turn it into an estimate without retyping everything.
- Open the lead and tap Accept at the bottom of the screen.
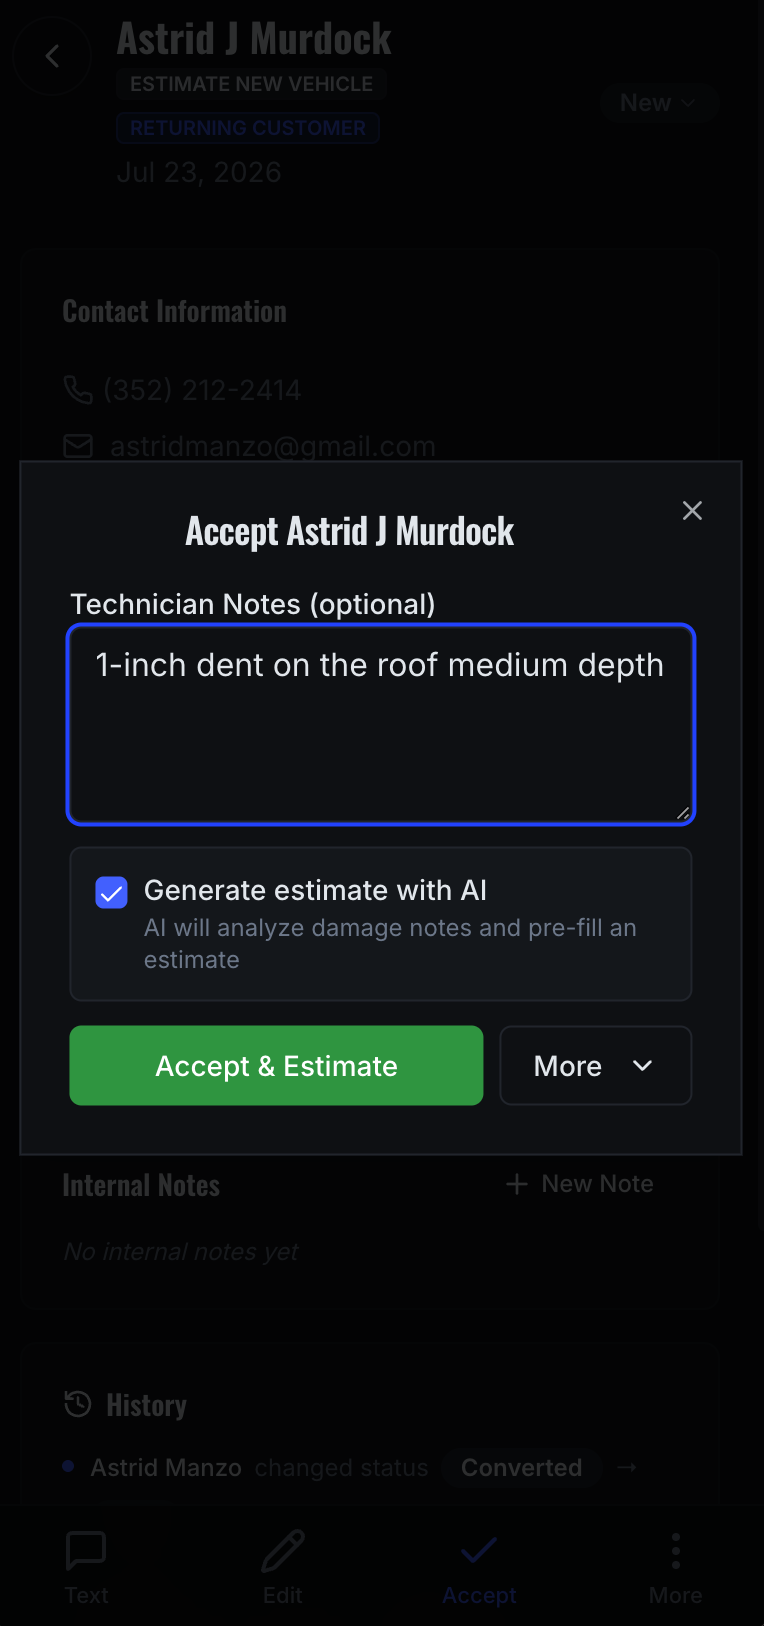
- This opens the estimate setup, where you can add technician notes and choose whether you want AI to help create the estimate.
Generate an estimate with AI
If you turn on Generate estimate with AI, you can describe the damage in plain words — for example: 1-inch dent on the roof, medium depth.
The app uses your notes to pre-fill an estimate, and you can still edit everything before saving. AI is just there to help you move faster — you're always in control of the final estimate.
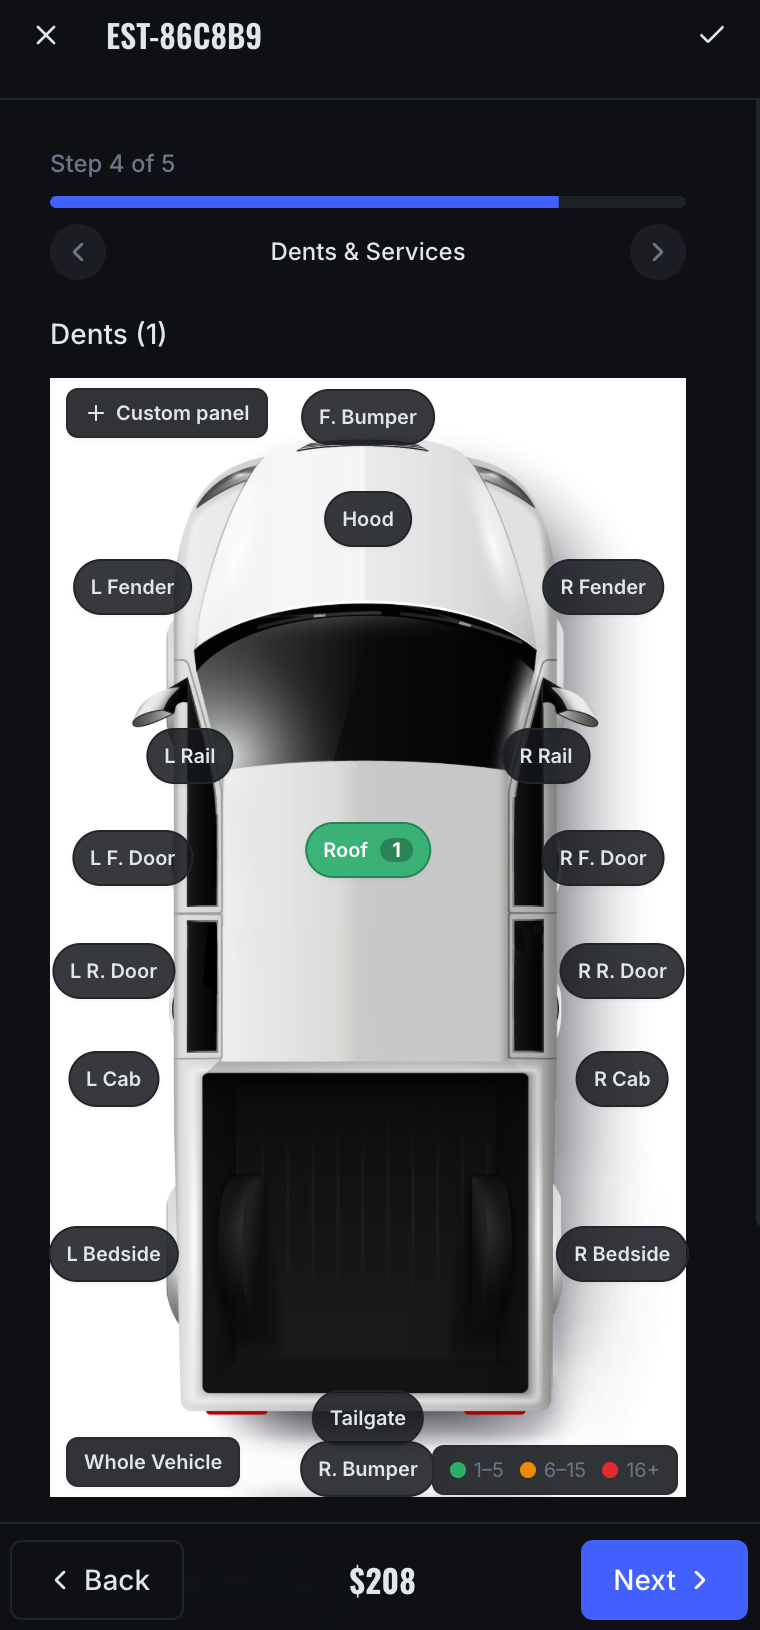
Build or edit the estimate
After accepting the lead, you can review the estimate builder and:
- Select the vehicle panel
- Add dents
- Adjust size and depth
- Use your pricing matrix
- Change the price manually
- Add R&I or extra services
- Add photos and notes
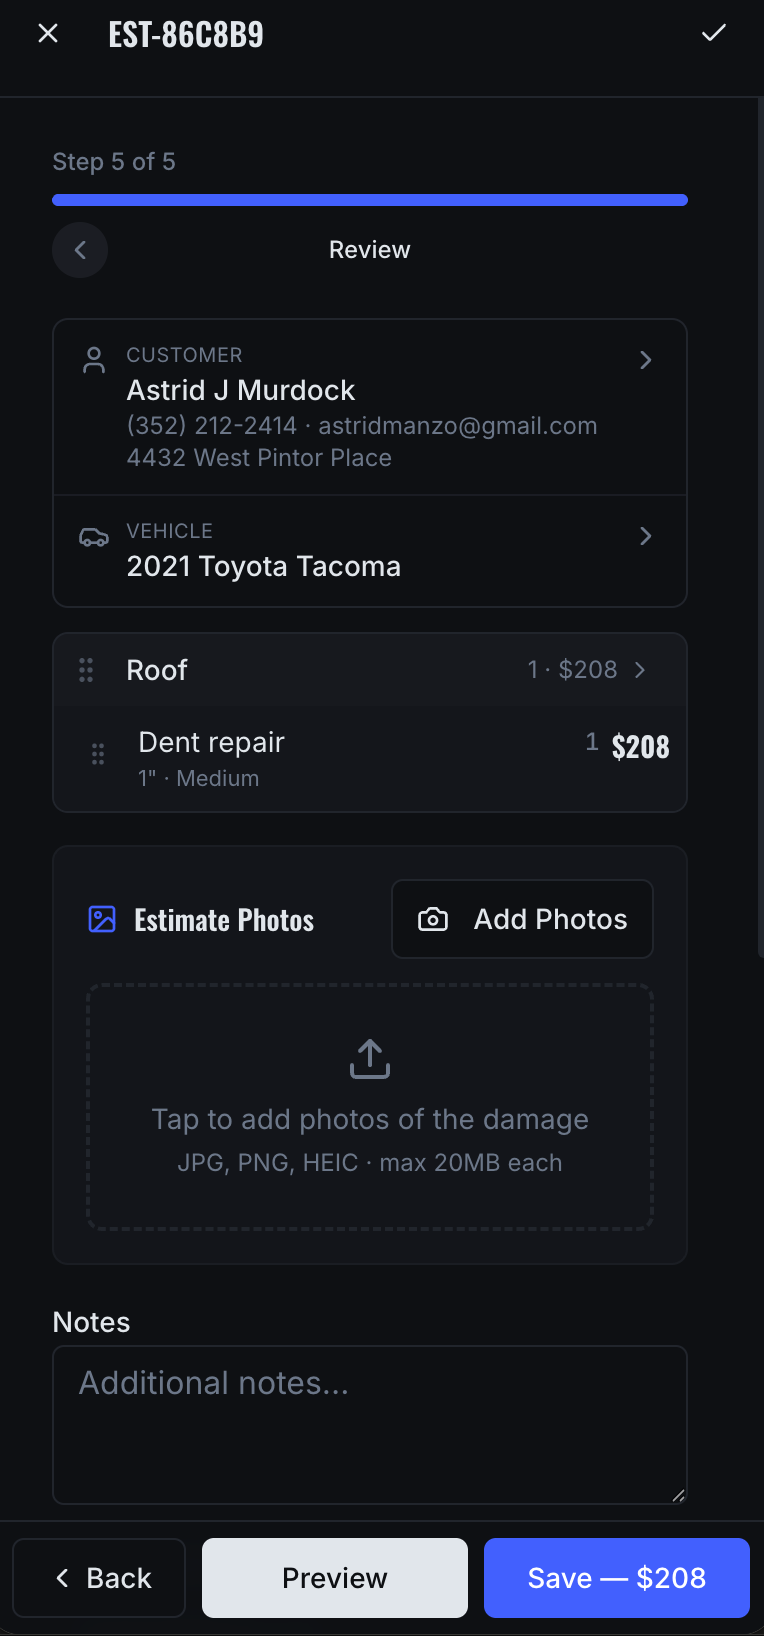
Once everything looks good, save the estimate.
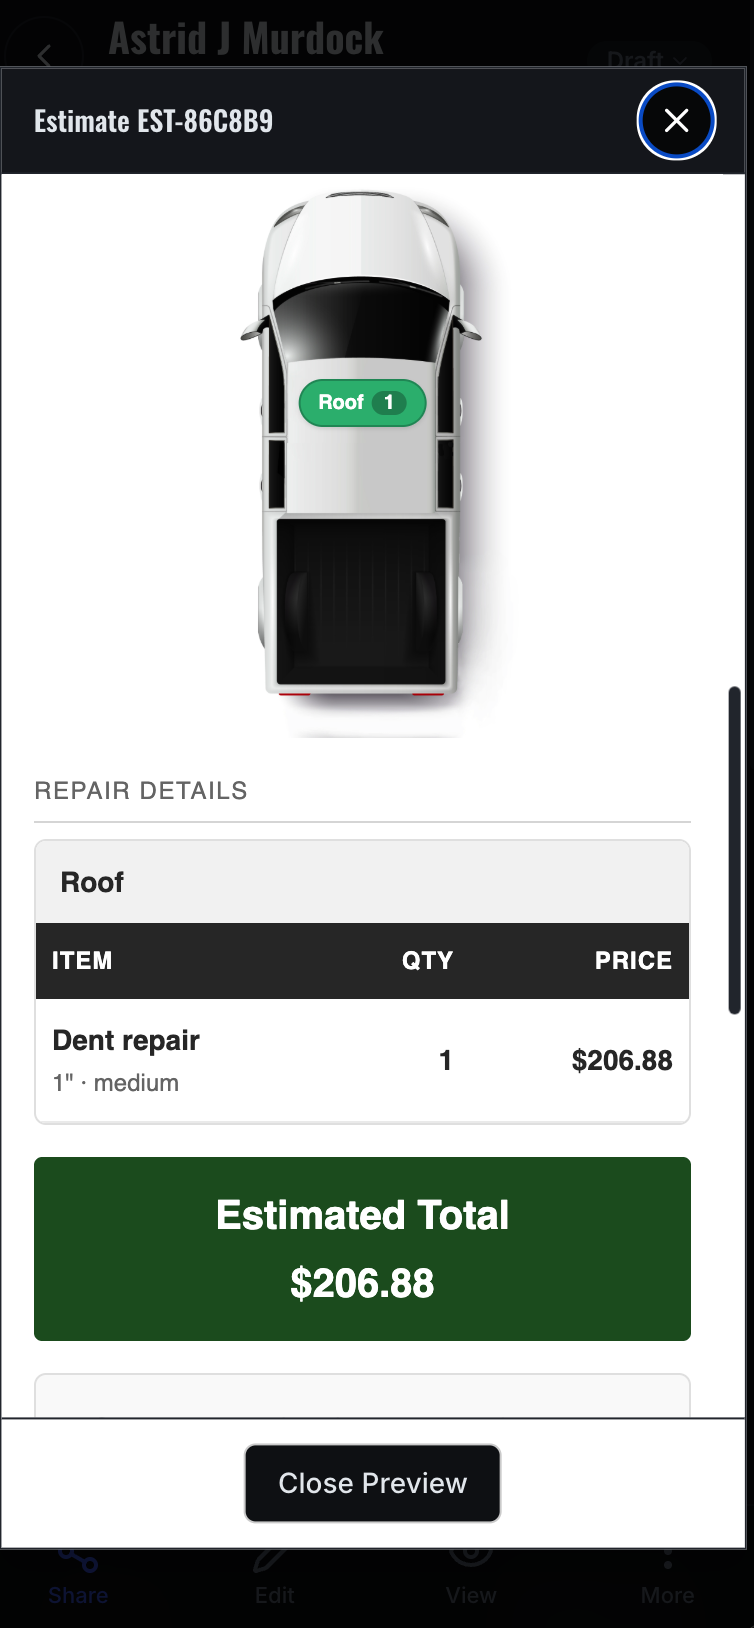
Share the estimate
After the estimate is saved, tap Share. You can send it by:
- Text message
- Copied branded link
- PDF download
- PNG image download
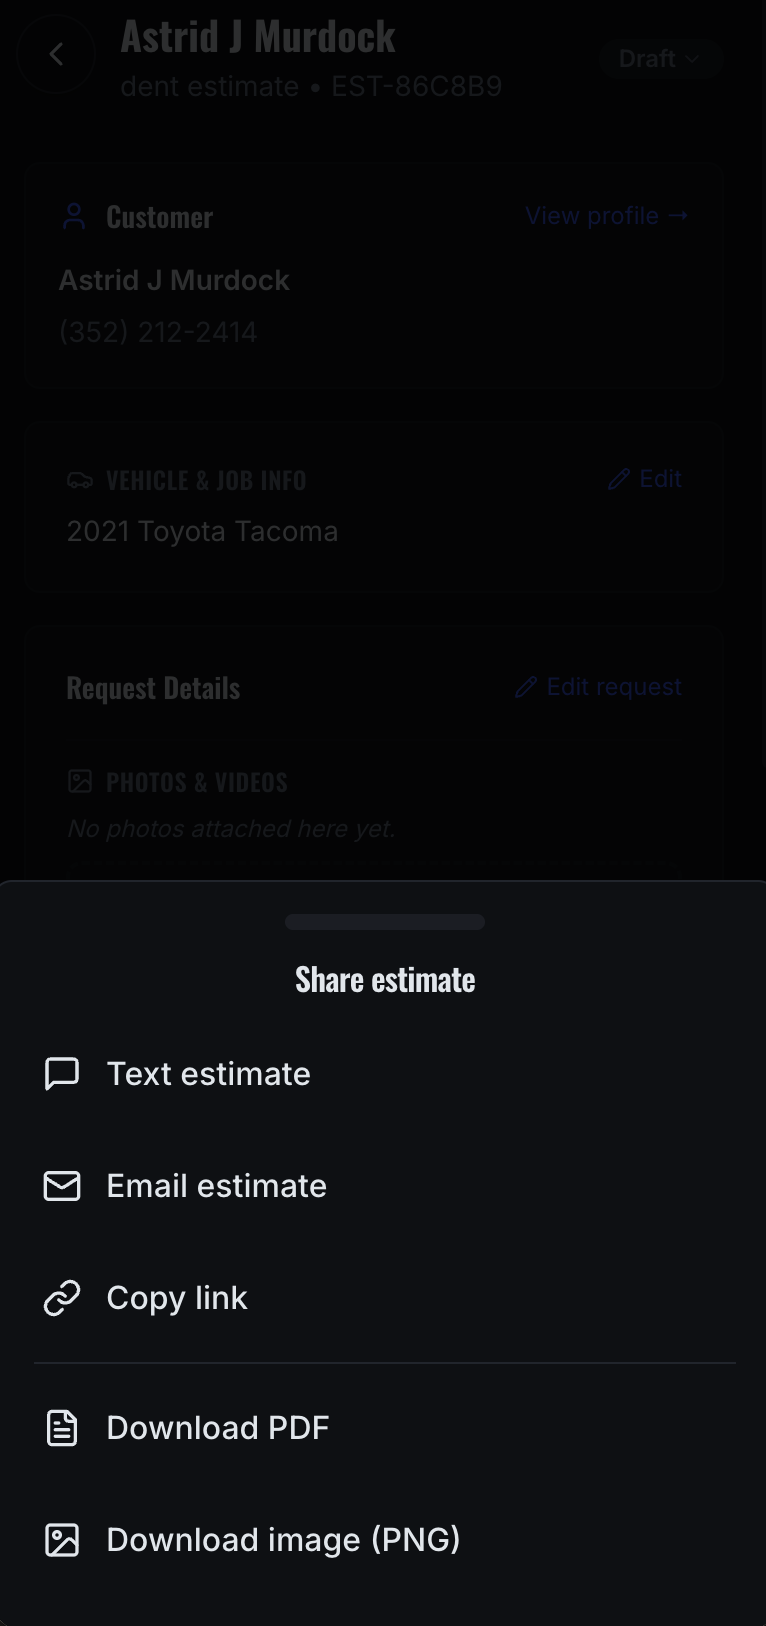
For most customers, text is the fastest option. The customer receives a branded estimate link where they can review everything and tap Approve Estimate.
What happens when the customer approves?
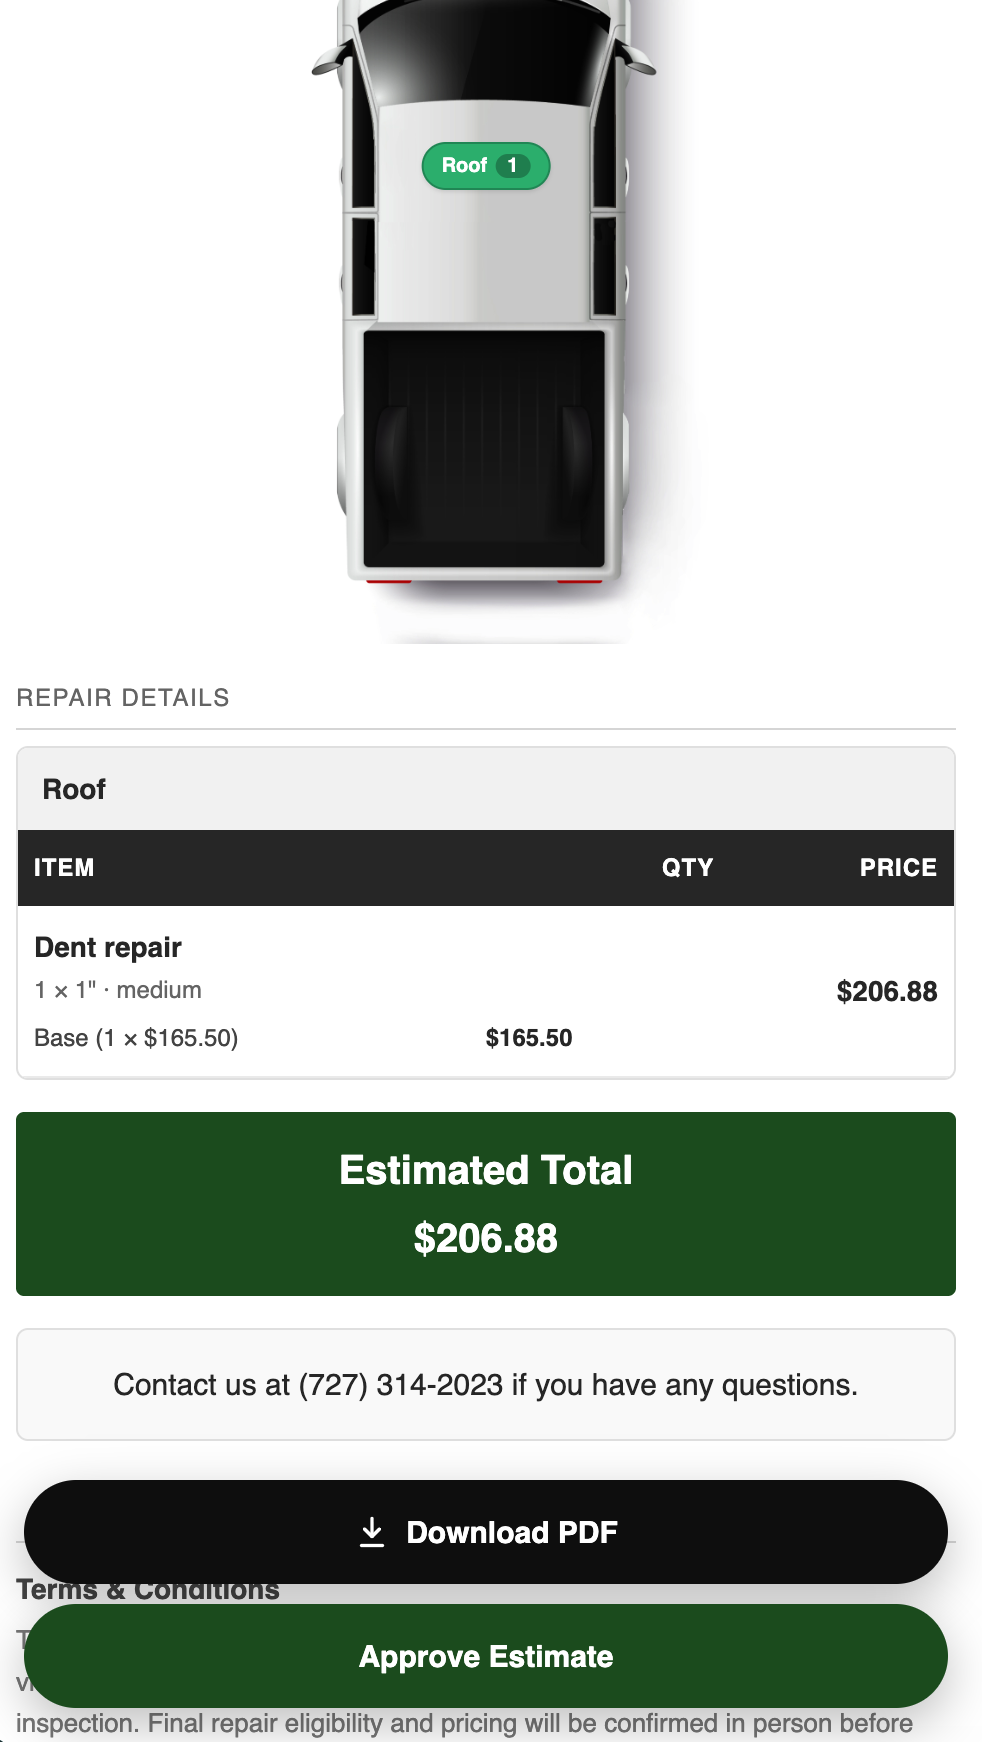
When the customer approves the estimate, you'll be notified. The estimate automatically moves forward and becomes a work order, so you can schedule the job.
That keeps the flow simple: Lead → Estimate → Customer approval → Work order → Schedule job. The original estimate stays connected to the customer, vehicle, and job history.
Where leads come from
- Your public request form — a branded page you share on your website, socials, or in a text. Customers fill in their details, describe the damage, and attach photos.
- Manually — anything that arrives by phone, text, referral, or walk-up, added by you.
What the customer fills in
- Contact — name, phone, email (optional), postal code, and whether they want you to come to them or they'll drop the vehicle off.
- Vehicle & damage — year/make/model, how many dents, a description, plus up to 10 photos they can shoot straight from their phone.
- Request received — confirmation.
The lead lands in your list as New right away, with the photos attached.
The Leads page
By default you see two groups: New Leads at the top and Active below. Search by name or phone at any time, and select several leads at once to change their status or delete them in bulk.
Filter by status — and here's what each one means:
- New — just arrived, nobody has touched it.
- Needs More Info — you've flagged it as incomplete.
- Info Requested — you've asked the customer for more detail.
- Ready for Estimate — accepted, time to price it.
- Converted to Estimate — an estimate exists for this lead.
- Rejected — not going ahead.
- Archived / No Response — closed out and out of your way.
Everything you can do from a lead
- Text the customer, send them the request form link, or send a "need more info" message.
- Accept — type a damage description and optionally tick Generate estimate with AI. You can also choose In-Person Estimate, which sends you to booking a visit instead.
- Create Estimate — skip straight to the builder.
- Reject or Archive — pick a reason so your reports tell you why work is being lost.
- Convert to customer — turn the lead into a permanent customer record.
- Add person — a second contact on the same job, such as a spouse or a fleet manager.
- Merge into another lead — when the same person came in twice.
- Edit or Delete.
Good to know
- Accepting a lead sets it to Ready for Estimate — the handoff point between enquiry and job.
- Photos the customer uploaded travel with the lead into the estimate.
- Rejected leads archive themselves shortly after the rejection text goes out, with an Undo option.
- Rejection reasons feed the Rejections report and the lead source feeds the Sources report — fill them in honestly and you get real marketing data for free.
Tips & edge cases
- The Dashboard "New Leads" list shows only leads in the New stage.
- Deleting a lead also removes related drafts. You have a short undo window via the toast.
- A lead with 2+ customer-initiated reschedules shows a visual warning so you can decide whether to keep chasing it.
- Calls under 10 seconds are not turned into leads (they're treated as missed/short).
Where to find it
Desktop: sidebar → Leads. Mobile: bottom tab → Leads.